Postman Collection
Our Postman collection features the complete PowerOffice API directly imported from the developer portal's OpenAPI specification. Explore simplified integration and comprehensive documentation for a seamless development experience. Unlock the potential of PowerOffice API effortlessly.
Setup Environment
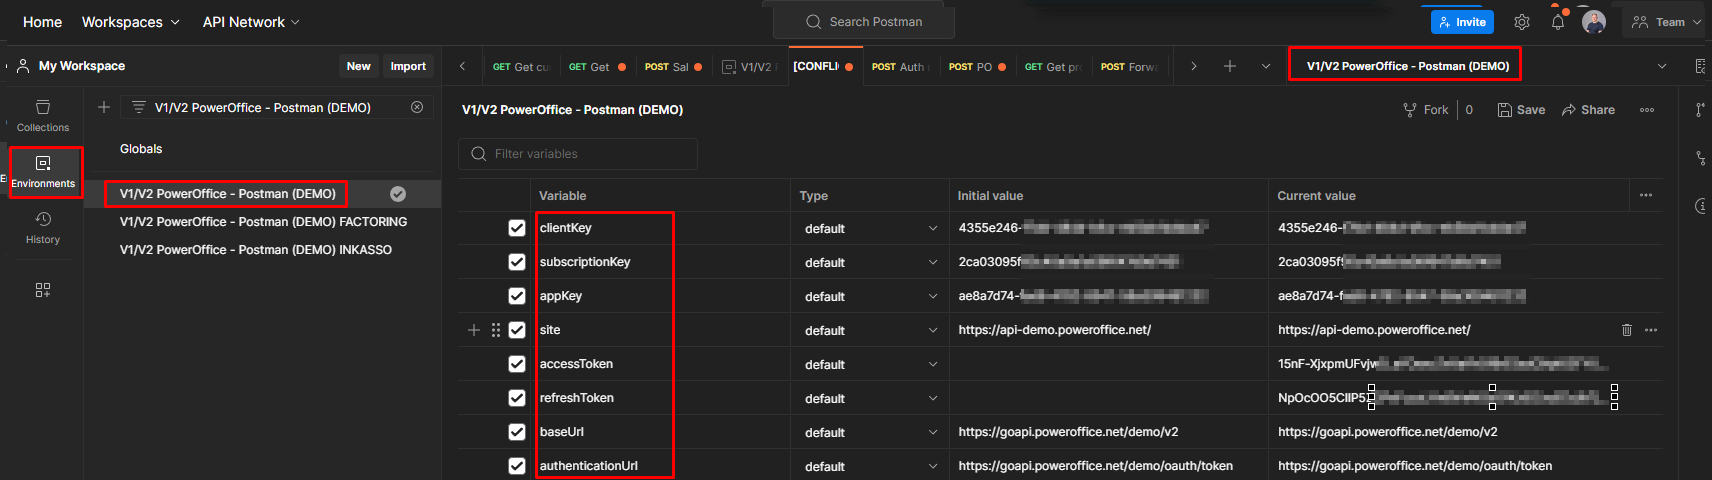
To begin using our postman-collection you should set up your environment. This setup guide should give you access to test out both v1 and v2-collections. The environment should contain a few mandatory variables to make your work with this collection easier. These are:
clientKey: Unique key created when adding the application on a client in PowerOffice Go
subscriptionKey: Unique key representing the product subscription the integration use in the PowerOffice developer portal
appKey: A unique, but fixed key associated with your integration
site: For the demo-environment the base URL for all api-calls for v1 is:
https://api-demo.poweroffice.net/accessToken: A unique token granted after authenticating with the application key, client key and subscription key. Will expire after 10 minutes in v1 and 20 minutes in v2.
baseUrl: For the demo-environment the base URL for all api-calls for v2 is:
https://goapi.poweroffice.net/Demo/v2authenticationUrl: For the demo-environment the URL to request access token is:
https://goapi.poweroffice.net/Demo/OAuth/Token
Read more about the authentication and authorization process here:
Request v2 access token
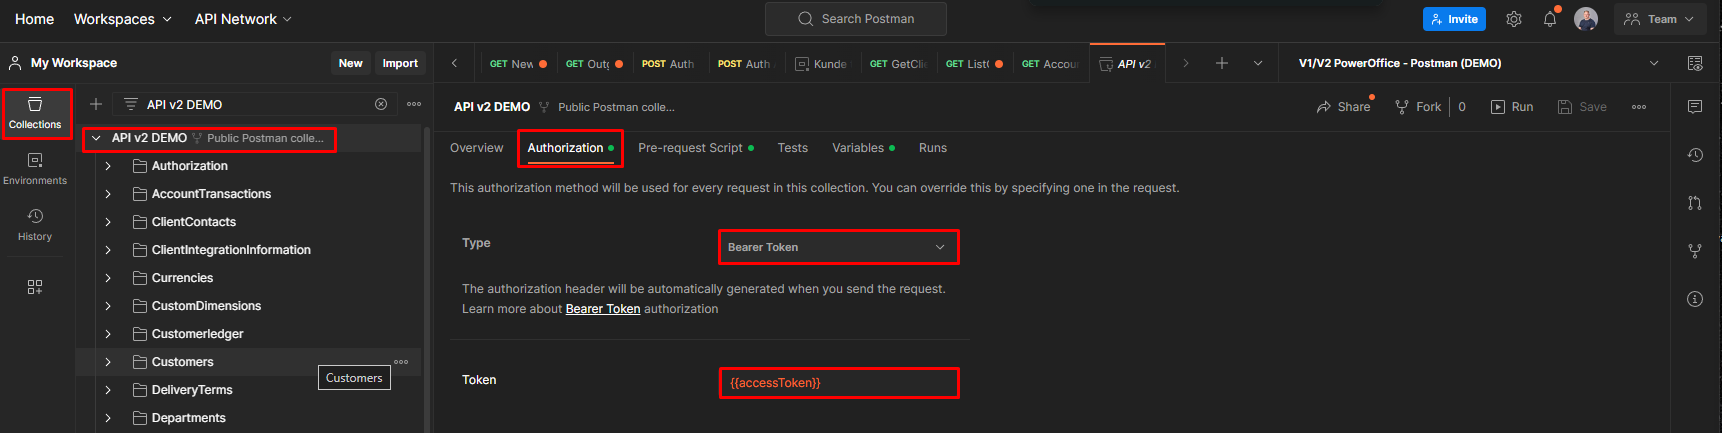
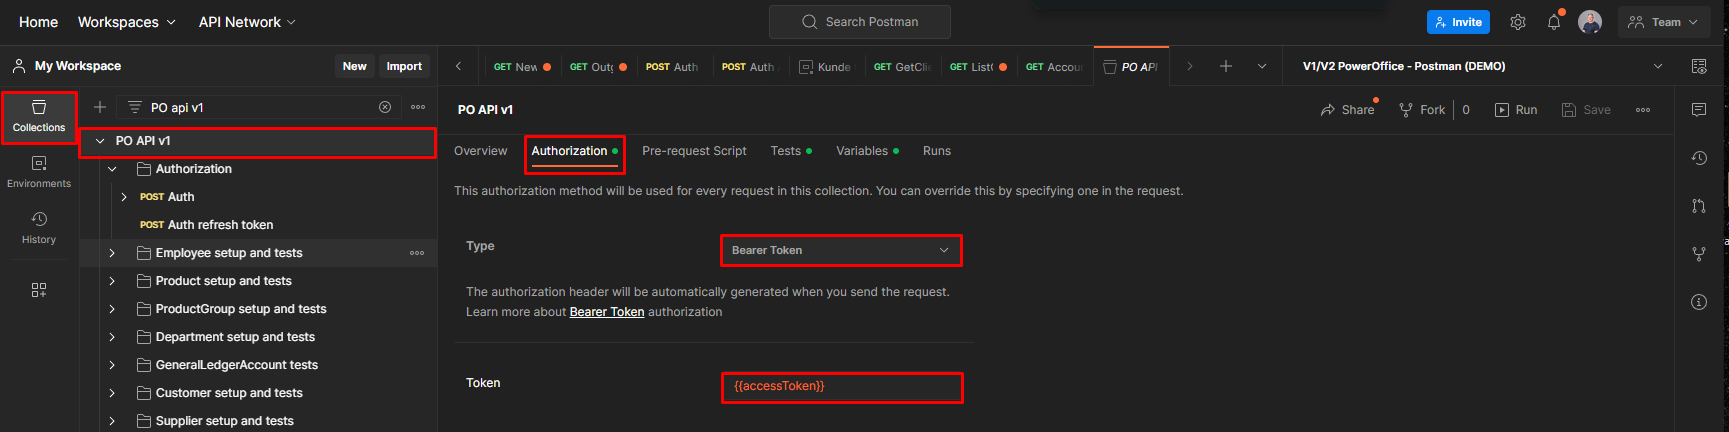
Once you are back in your collection you will have to set up your collections authorization, pre-request script and variables. Authorization should be set as Type: Bearer Token, and your token should be set as {{accessToken}}.
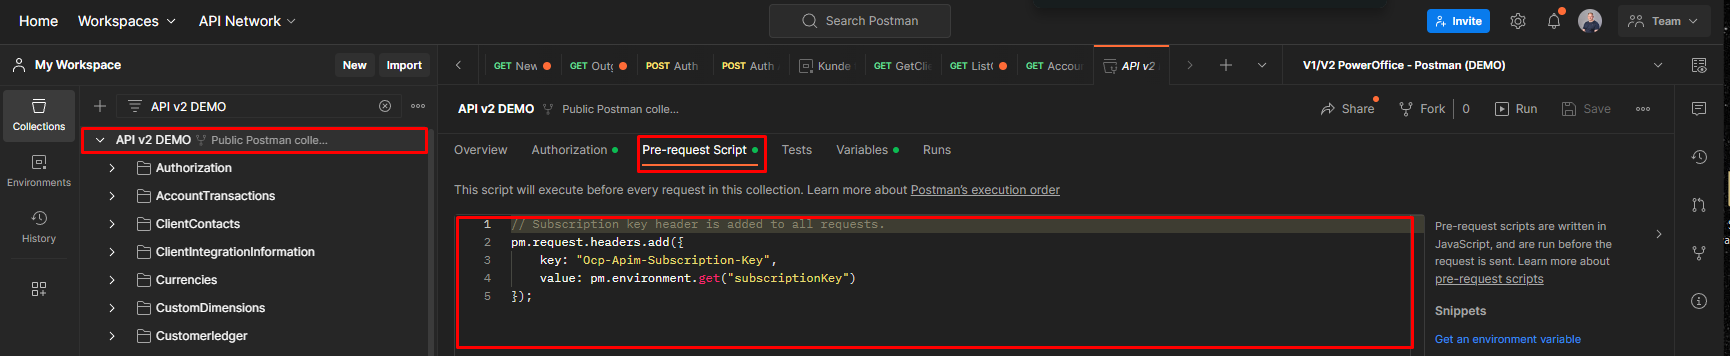
The Pre-request Script will be executed before every request in your collection. To add Subscription key header to all request simply add this script to your Pre-request Script:
// Subscription key header is added to all requests.
pm.request.headers.add({
key: "Ocp-Apim-Subscription-Key",
value: pm.environment.get("subscriptionKey")
});
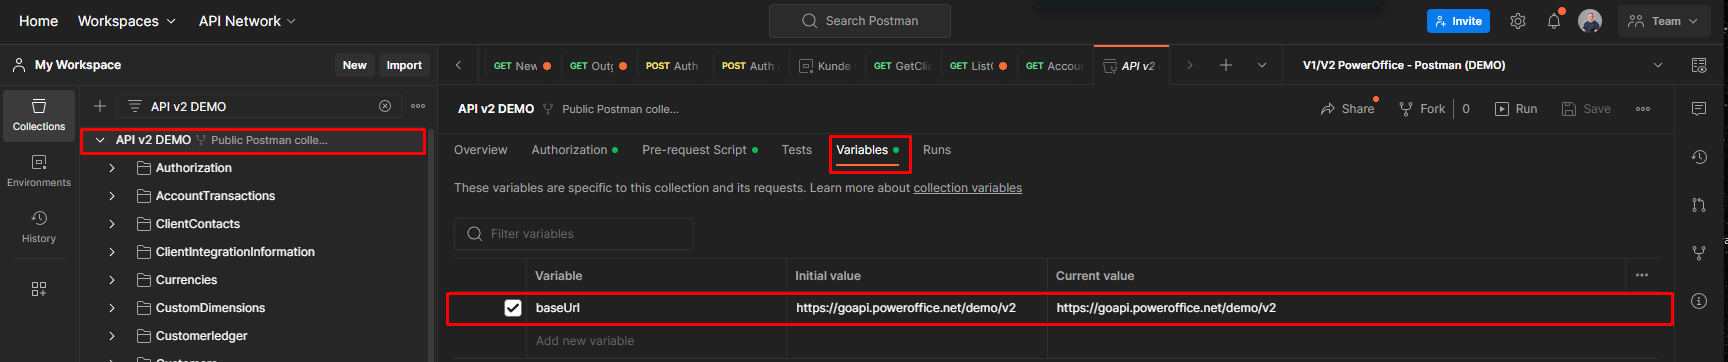
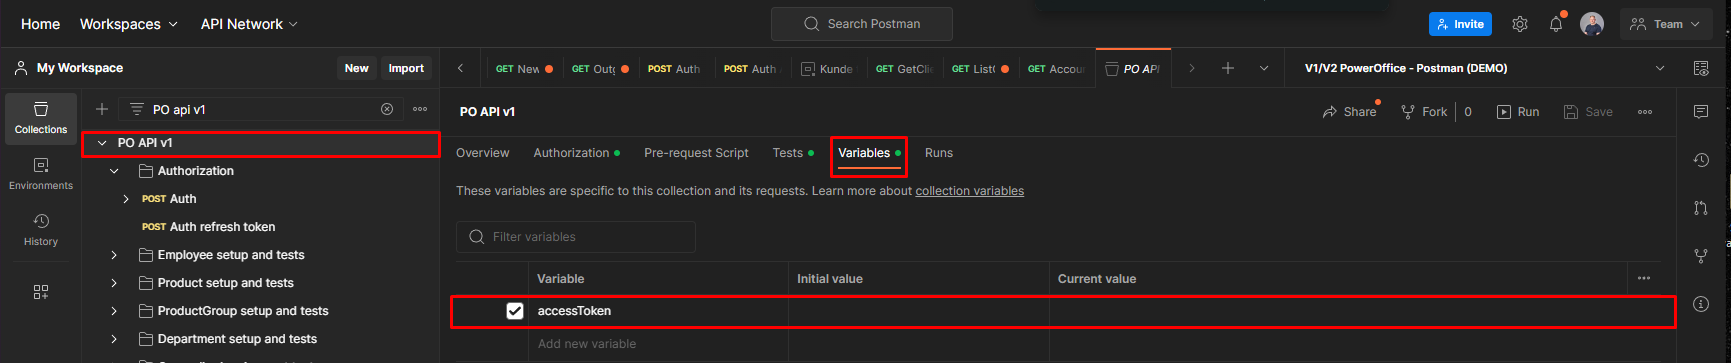
In your collections variables, you will then add a variable called baseUrl and put the initial value as https://goapi.poweroffice.net/demo/v2. Copy this value and paste it into the Current value as well.
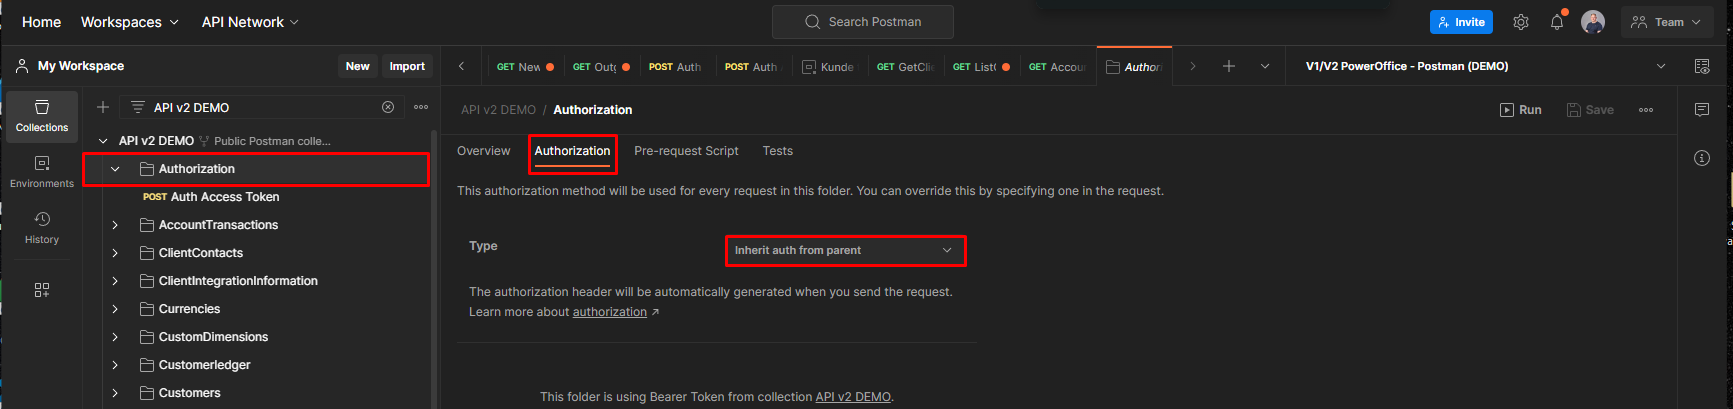
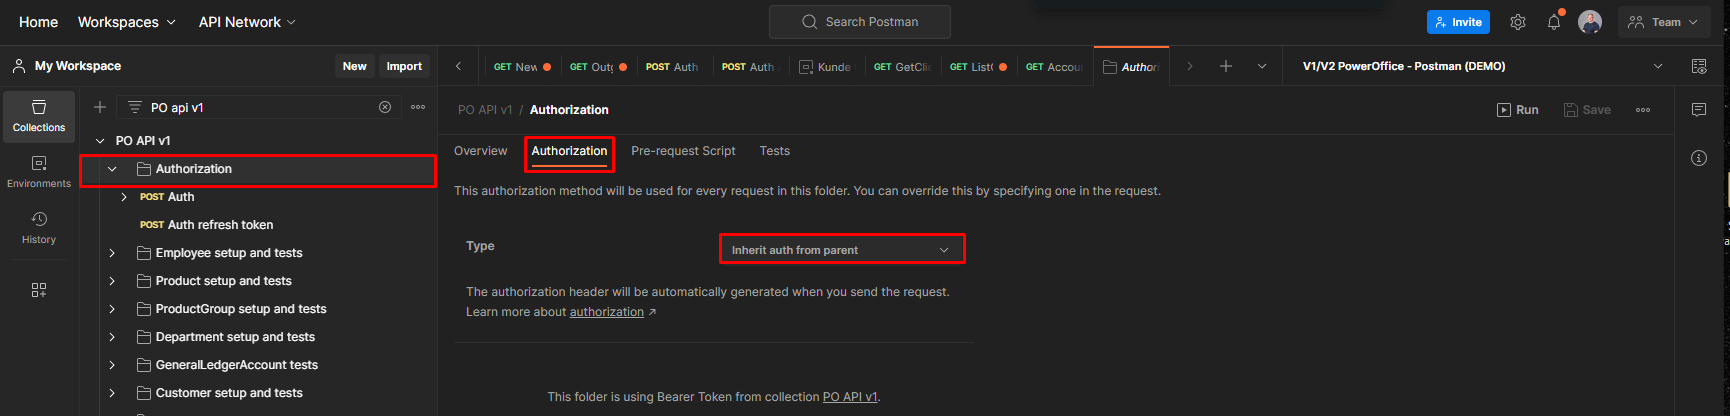
Within your v2 collection, enter the folder called "Authorization". To change the authorization method used for every request in that folder you need to press further on "Authorization" and choose Type: Inherit auth from parent.
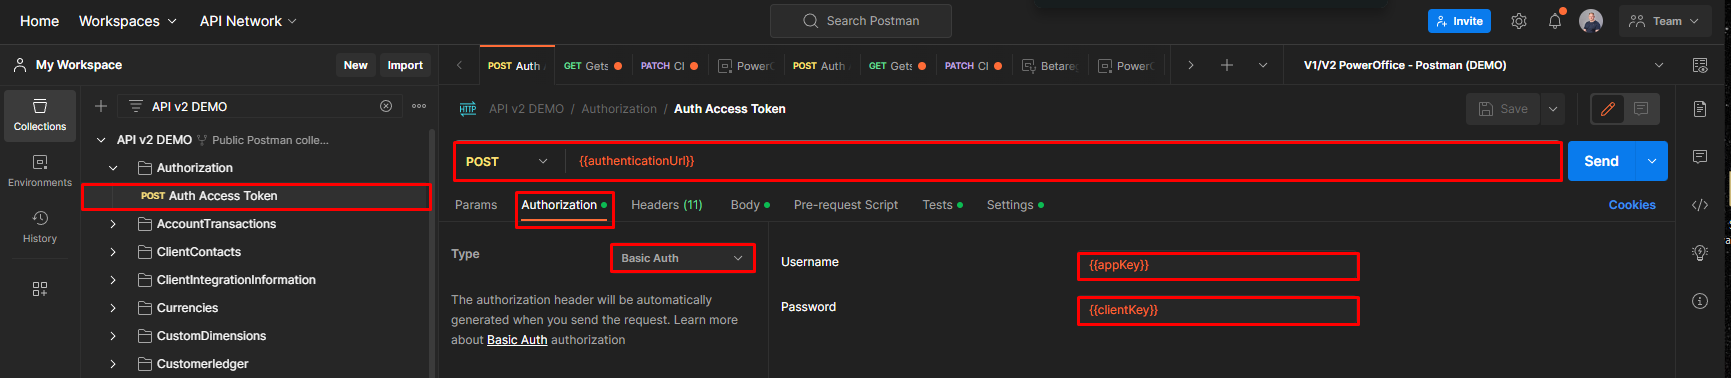
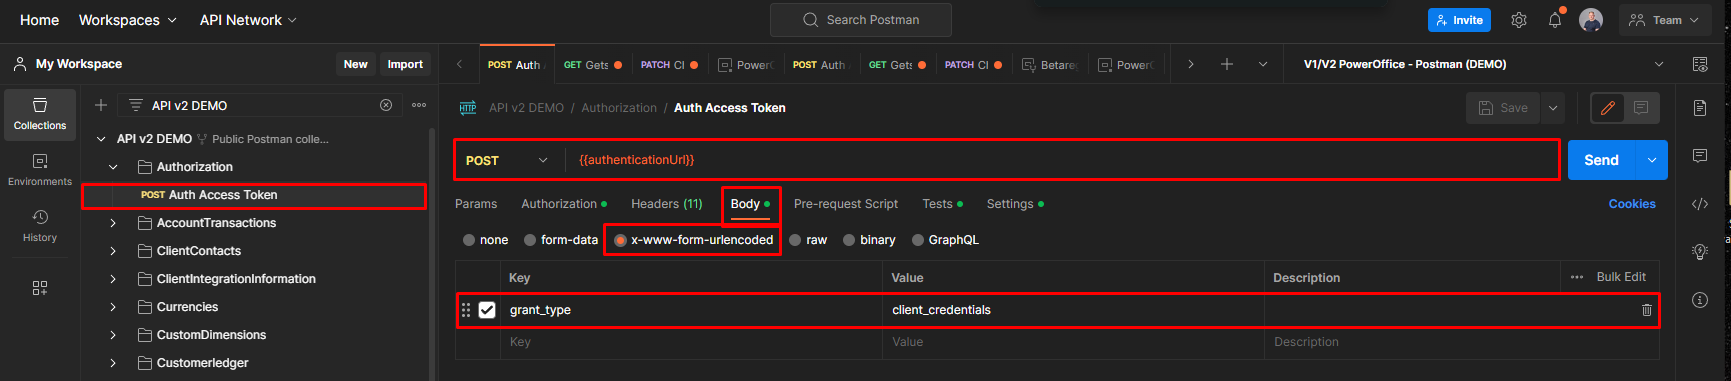
You are now ready to edit the post request for an Auth Access Token. Press on the request and enter {{authenticationUrl}} in the Url. Then enter the authorization subfolder and choose Type: Basic Auth. The next settings should be Username = {{appKey}} and Password = {{clientKey}}.
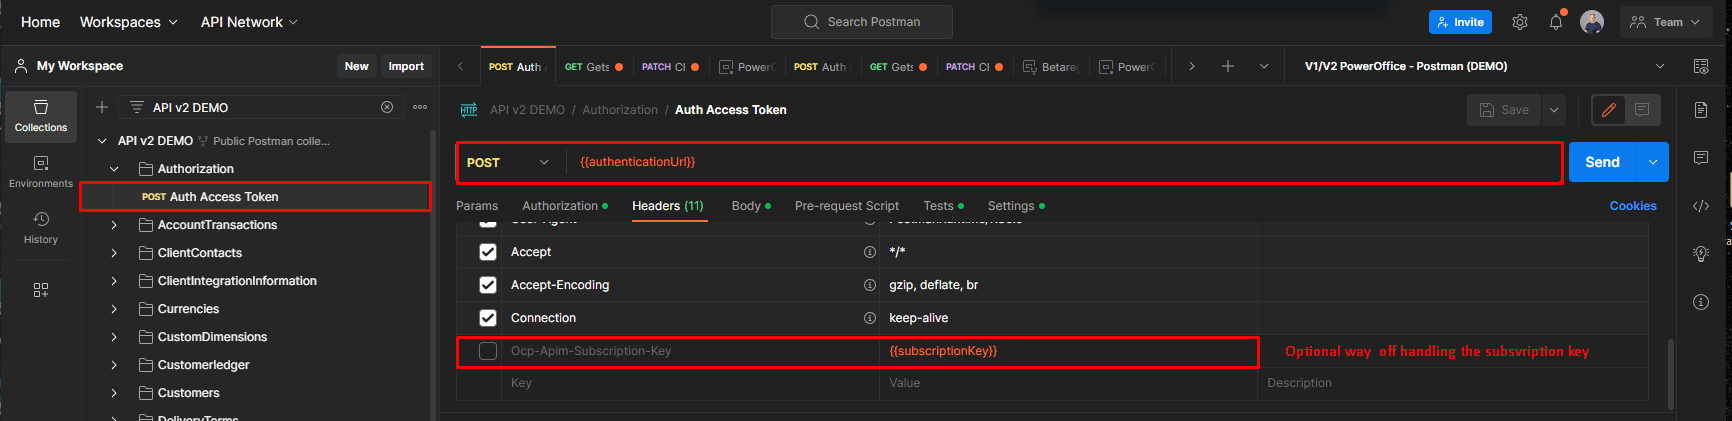
Option:
An optional way of handling the subscription key, if you are not using the Pre-request Script, is to add a variable in the Auth Access Token call, called Ocp-Apim-Subscription-Key. This value should be {{subscriptionKey}}.
The format of the Body should be x-www-form-urlencoded. The key should be grant_type, further set this value as client_credentials.
Also make sure you have chosen the correct environment from the top right drop down menu. You should now be able to request for a v2 access token.
Request v1 access token
Once you are back in your collection you will have to set up your collections authorization, pre-request script and variables. Authorization should be set as Type: Bearer Token, and your token should be set as {{accessToken}}.
In your v1-collections variables, add a variable called accessToken.
Within your v1 collection, enter the folder called "Authorization". To change the authorization method used for every request in that folder you need to press further on "Authorization" tab and choose Type: Inherit auth from parent.
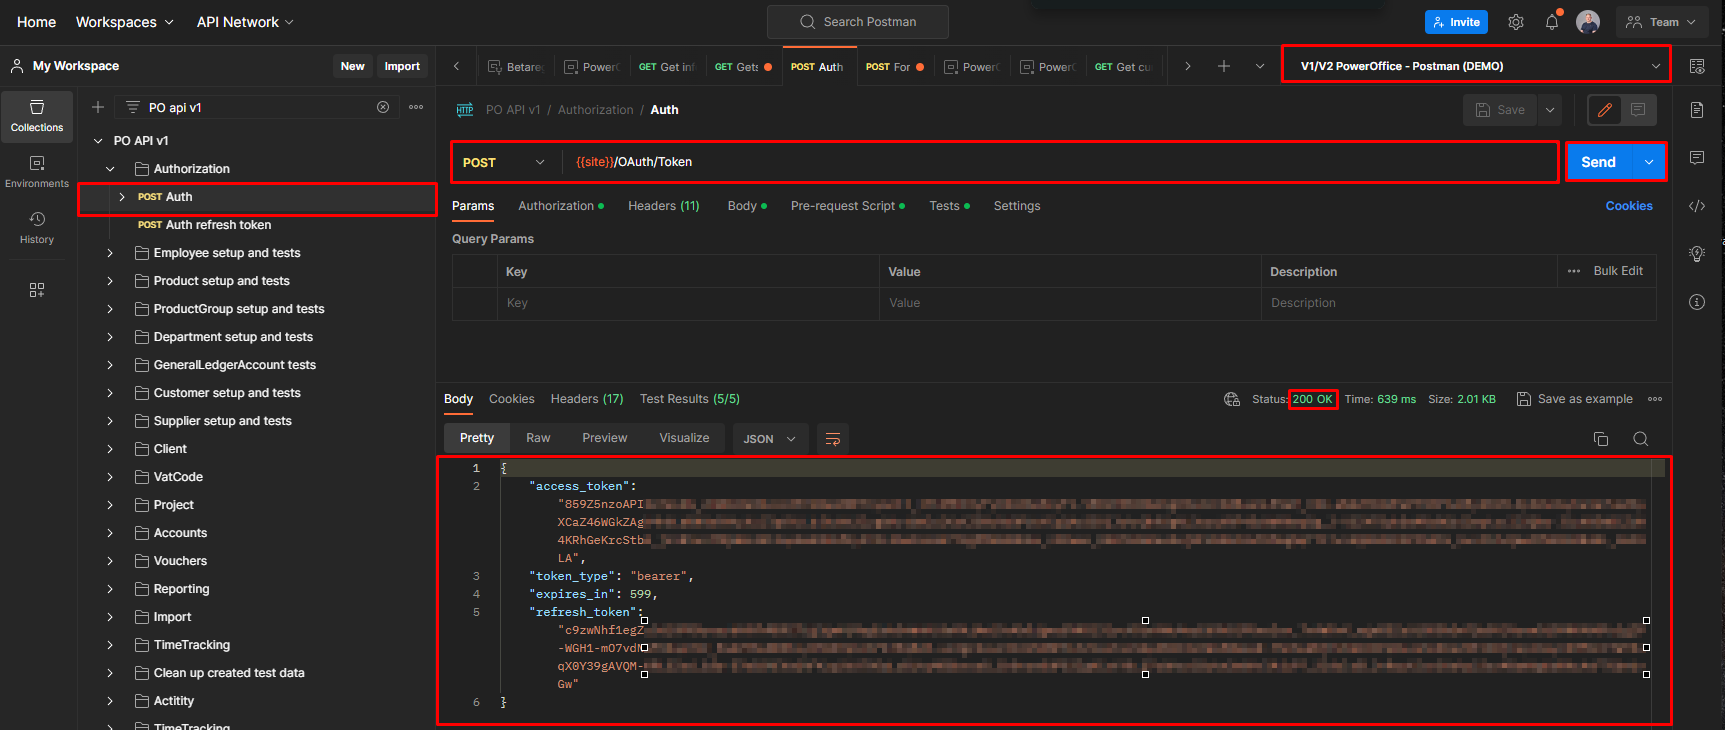
In the Auth-request make sure the URL is set as {{site}}/OAuth/Token.In the authorization tab within the request, make sure Type is set as Basic Auth and you enter Username = {{appKey}} and Password = {{clientKey}}.
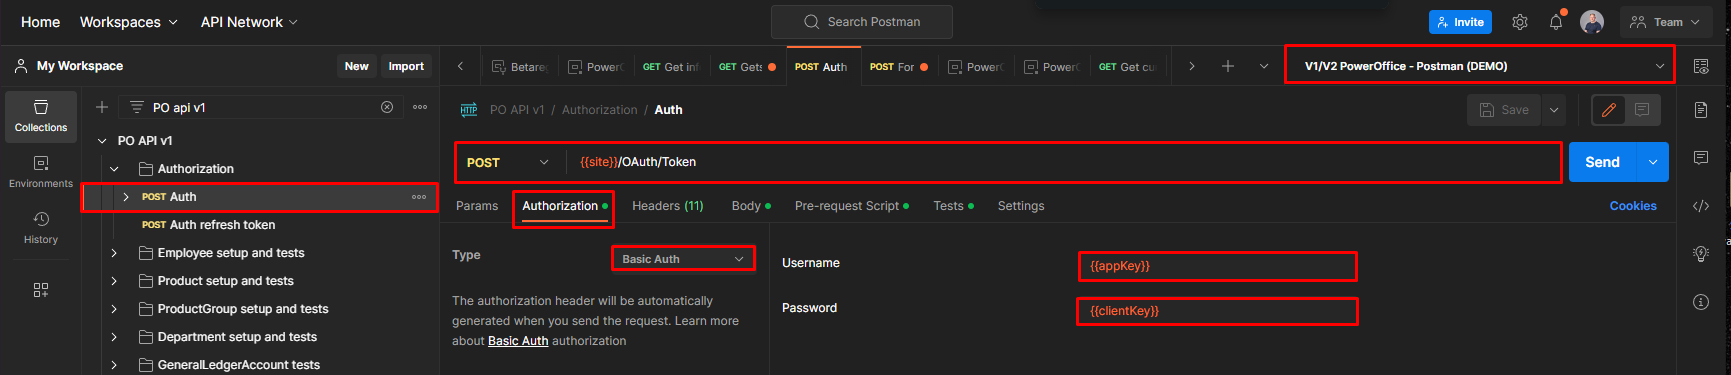
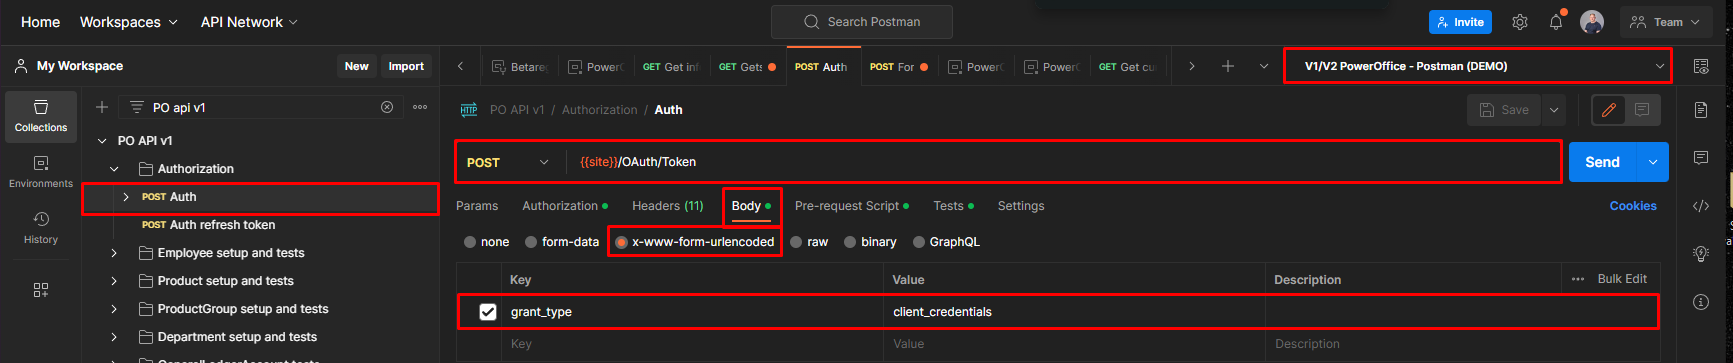
Last, you enter the Body tab, which should be x-www-form-urlencoded. The key should be grant_type, further set this value as client_credentials. Remember to check if you have chosen the correct environment from the drop down menu on the top right. You should now be ready to request for v1 access token.
Successful request
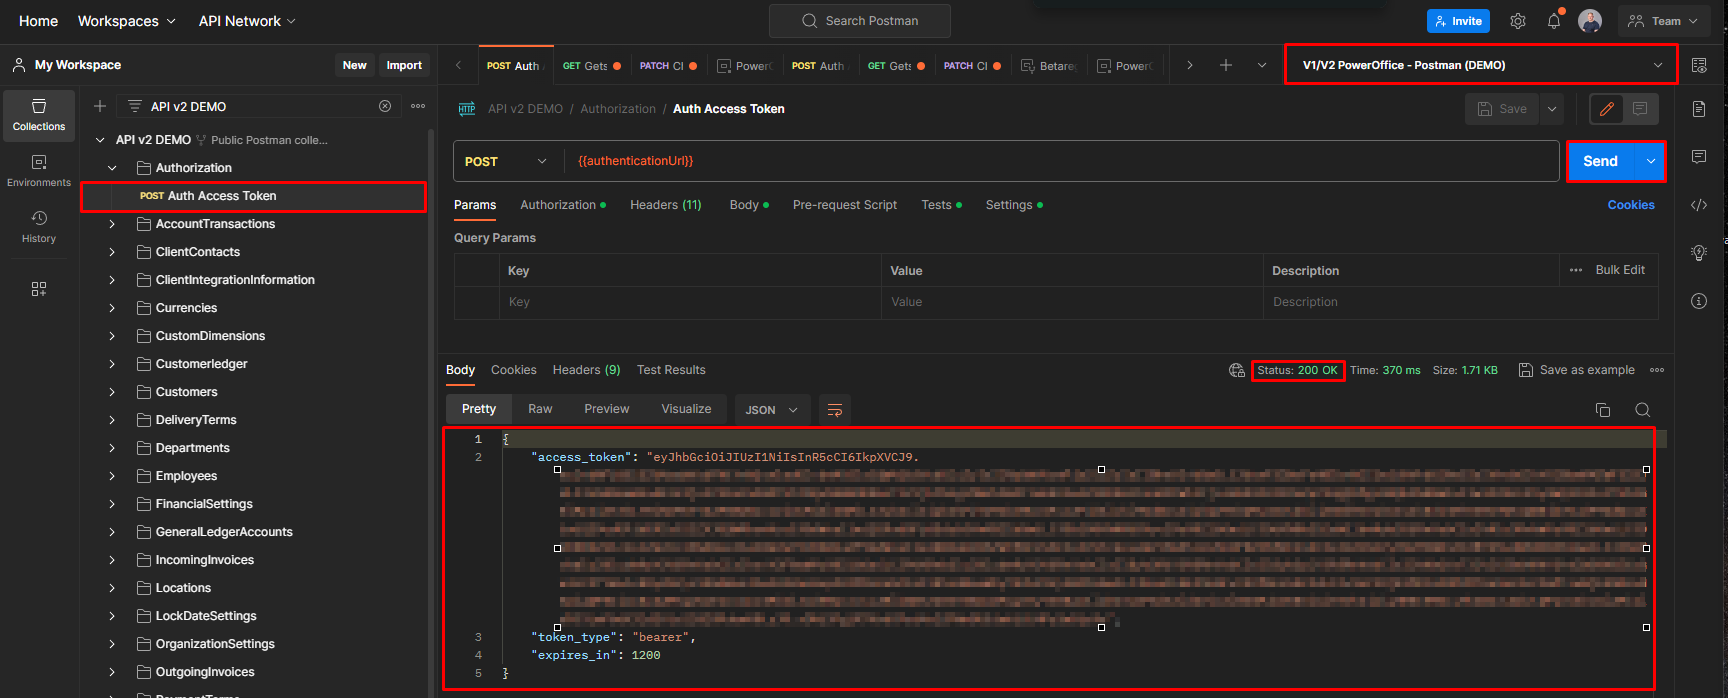
Successful v2-request
In v2, a successful request will give you a status 200 OK - providing you with a jwt-token that contains a detailed payload that will give you details about your active client subscriptions and access to endpoints/privileges in the v2-API. The endpoint ClientIntegrationInformation will give a decoded version of this token, giving information about the client integration, listing the current access privilege state for a client.
Successful v1-request
In v1, a successful request will give you a status 200 OK - providing you with an access token. The access token and expiration date/time should be safely stored somewhere to be reused on subsequent API-requests. The access token can be reused by new sessions until it expires. After an access token has been obtained, you can use it to call GO-API functions. The access token is provided in the request to authorize/authenticate the API call.
Note that newer integration, as of march 2024, will not be given a refresh token.